Basic Editing
Word has many features that enable you to do a wide range of things to any document. This lesson will cover basic editing of a document.
Note: These instructions are an excerpt of Luther Maddy’s Word workbook. This full text is available in printed or eBook format from Amazon.com
Basic Editing
Opening Files
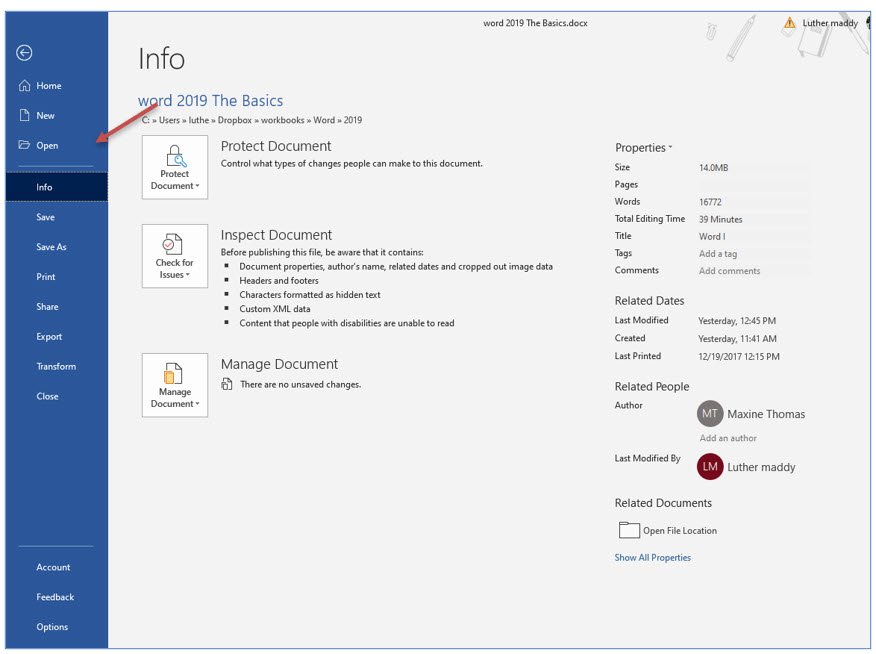
Once you have closed a document, you will need to open it before you can continue working with the file. To open a previously saved document you will use the Open command on the File menu.
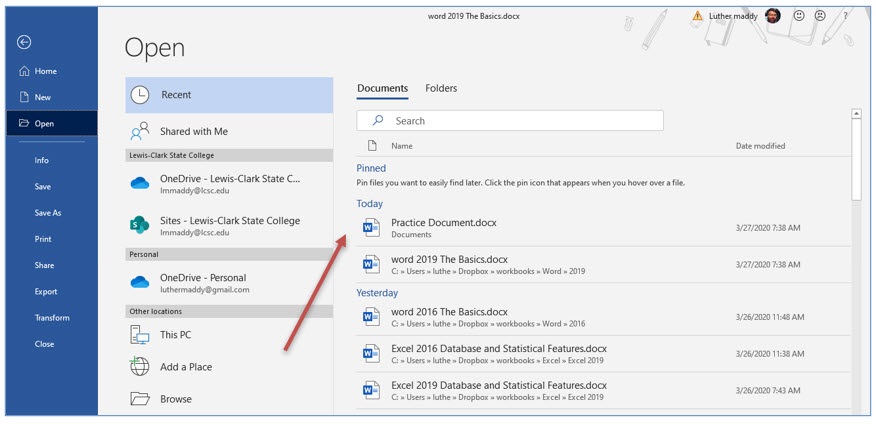
1. Open the File menu and choose Open.
The Open screen provides a list of files you have most recently worked with. The Practice Document should appear near the top of this list. To open this file you can simply click on it. To open a file that is not one you have accessed recently, you will need to access the drive or other storage location you stored the file in earlier. After selecting the storage location, then navigate to the folder where you saved the file to locate it.
2. In the list of recently accessed files, click once on Practice Document to select and open the file.
Moving the Insertion Point
The insertion point, sometimes called the cursor, shows you precisely where you are in the text. When you begin typing, the new text will appear at the insertion point’s location. The insertion point’s location is also very important when editing, adding or deleting text.
You can move the insertion point with the mouse by simply clicking where you want the insertion point. You can also move the insertion point using the keyboard. When moving around in a large document, the keyboard is often faster than attempting to use the mouse.
The power of the Control (Ctrl) key
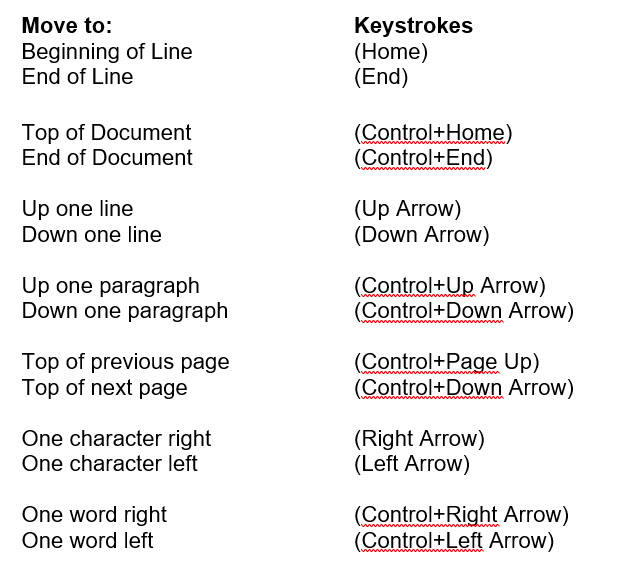
As you examine the abridged list of keyboard shortcuts to move the insertion point and delete text you should notice there are two combinations. First is the single key, such as the (End) key. Pressing the single key will move the insertion point or delete some text. However, when you press and hold the (Control) key before pressing the single more or deletion key, Word will either move farther or delete more. It’s a simple concept that is used with many movement and deletion keyboard shortcut keystrokes.
Here are some of the keyboard commands that you can use to move the insertion point within your document:
Delete Existing Text with the Keyboard
Erase character right of Insertion point (Delete)
Erase character left of Insertion point (Backspace)
Erase word left of insertion point (Control+Backspace)*
Erase word right of insertion point (Control+Delete)*
*Insertion point should be at the beginning of a word
In this portion of Lesson #2 you will use the keyboard to move the insertion point and then edit the text in the Practice document.
1. After opening the Practice Document, press (Control+Down Arrow) until you are at the beginning of the second paragraph.
When opening a document, Word automatically places the insertion point at the top of the document. (Control+Down Arrow) moves the insertion point down one paragraph each time you press it. If you created a blank line between these two paragraphs by pressing the (Enter) key, Word considers the blank line a paragraph.
Whenever you use the Control, Shift or Alt keys, you must keep that key held down while you press the other key to use keyboard shortcuts.
2. Press (Control+Right Arrow) twice to move to the beginning of the word learn.
3. Press (Control+Delete) to delete this word.
This deletes the word to the right of the insertion point.
4. Type the word gain and press (space) to replace the deleted word.
5. Press (Control+Right Arrow) twice again to move to the beginning of MS Word in this sentence.
6. Press (Control+Backspace) to delete the word about, the word left of the insertion point.
7. Type experience with and press (space).
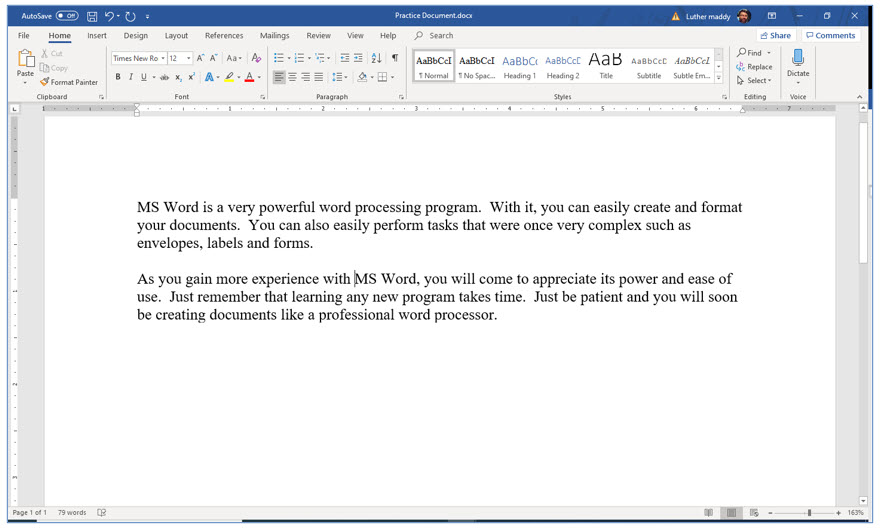
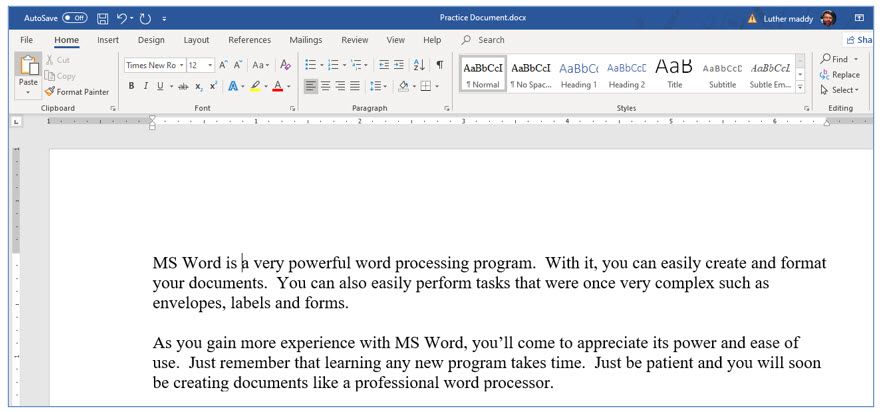
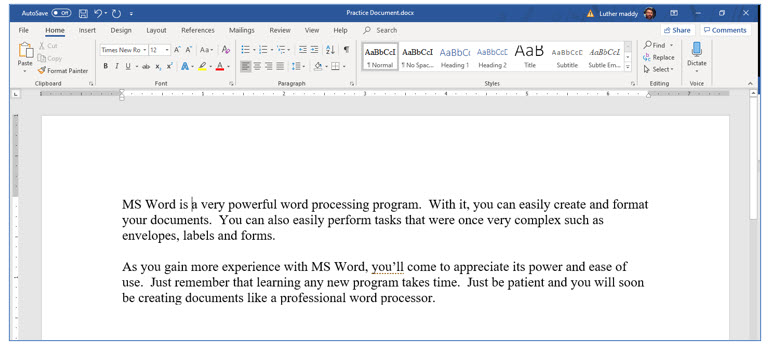
You have replaced the deleted word and your text should appear as that below.
Auto Spell Check
Word automatically checks your spelling and grammar as you type. Word will underline in red misspelled words or words not in its dictionary. When it finds a possible grammatical or typographical error, Word will underline the possible error in blue.
To quickly correct a word that is underlined in red, move the mouse pointer into that word and right-click. When you do, you will see a list of possible spelling suggestions. If the correct spelling is there, just click it and Word will make the correction for you. If Word underlines words that are spelled correctly, you can select Add from the Spelling shortcut menu to permanently add the word to the spell check dictionary.
You can also use the mouse to move the insertion point.
1. Use the mouse and click inside the word processing in the first line of the first paragraph.
2. Now, delete the letter “o” in this word and replace it with the letter “e”.
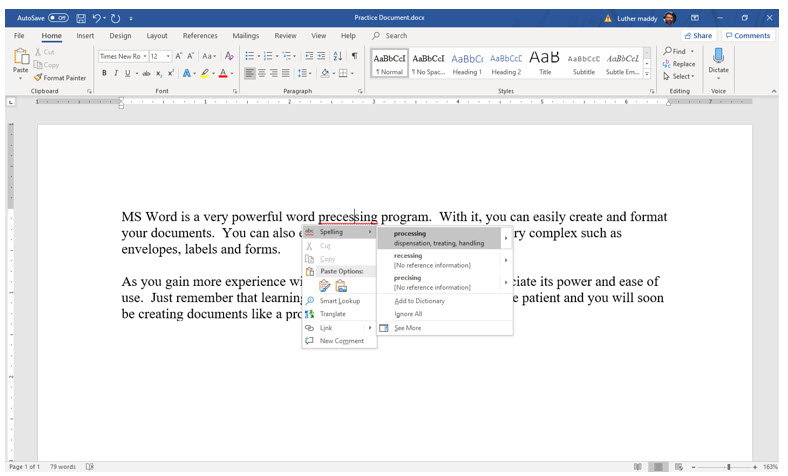
3. Move outside this word and you will see that Word has underlined the word precessing in red.
4. Move the mouse pointer into this word and right-click.
5. From the list of suggestions, click processing to correct this error.
Adjusting the Grammar Check Settings
When Word is first installed the default (automatic) grammar check settings are very basic. If you know you have a specific recurring problem with grammar, you may find that Word does not flag those errors. Leaving critical grammar errors in your document is not very desirable, and could be very embarrassing. To help prevent that, Word will let you adjust the errors it looks for and flags in your documents.
In this portion of this lesson you will adjust the grammar check settings to look for errors Word currently ignores in your documents. You can adjust the grammar check settings and many other default settings in the Word Options dialog box. You access the Word Options dialog box from the File menu.
1. In the first line of the second paragraph, use the (Delete) or (Backspace) keys to change you will to you’ll
2. Move the insertion point into another line.
Notice that Word does not alert you that there are any concerns in this document. Contractions are fine for informal writing, but if you are creating a formal document or report, then you would want to avoid contractions. We will assume that you are creating a formal document and want MS Word to alert you when you use a contraction.
You will now adjust Word’s grammar settings so that it will inform you when you use contractions in your documents.
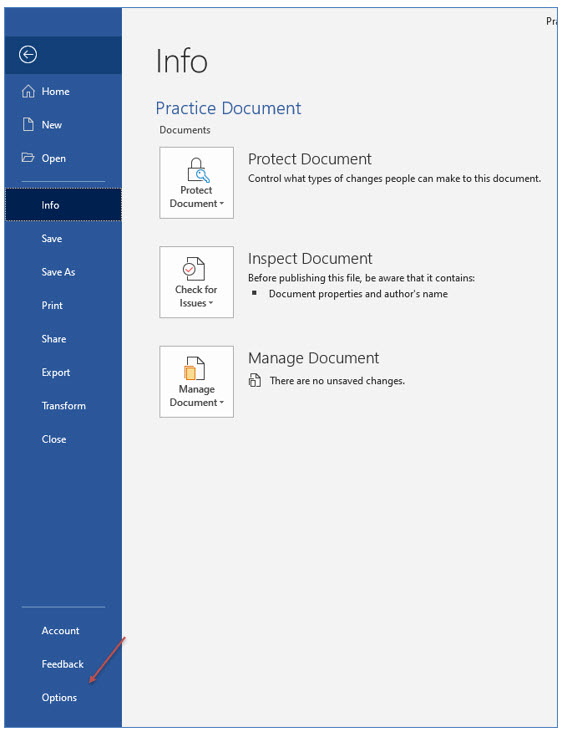
3. Click File to open the File menu and then choose Options.
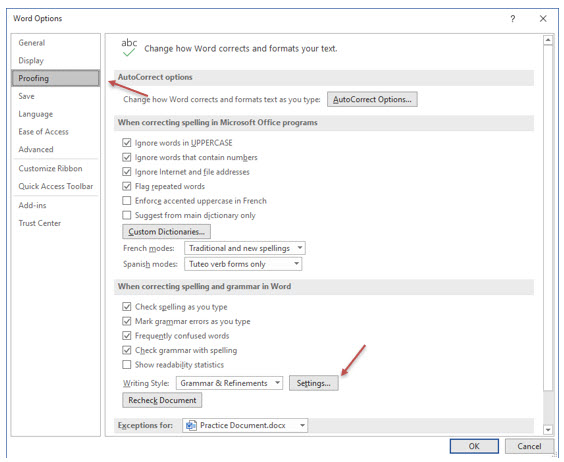
You should now see the Word Options dialog box. Here you can adjust many of Word’s default settings.
4. In the Word Options dialog box, select Proofing and then click the Settings… button in the “When correcting spelling and grammar in Word” section.
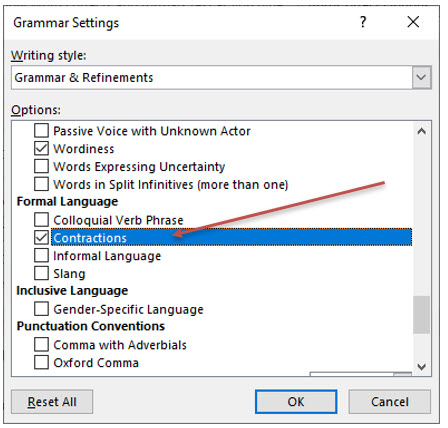
You should now see the Grammar Settings dialog box. Here you can specify what grammar errors you want Word to check. For this exercise, you will turn on Subject-verb agreement checking.
5. In the Grammar Settings dialog box, scroll down until you find the Contractions in the Formal Language section. Turn this option on and click OK.
6. Click OK again to leave the Word Options dialog box and return to the document.
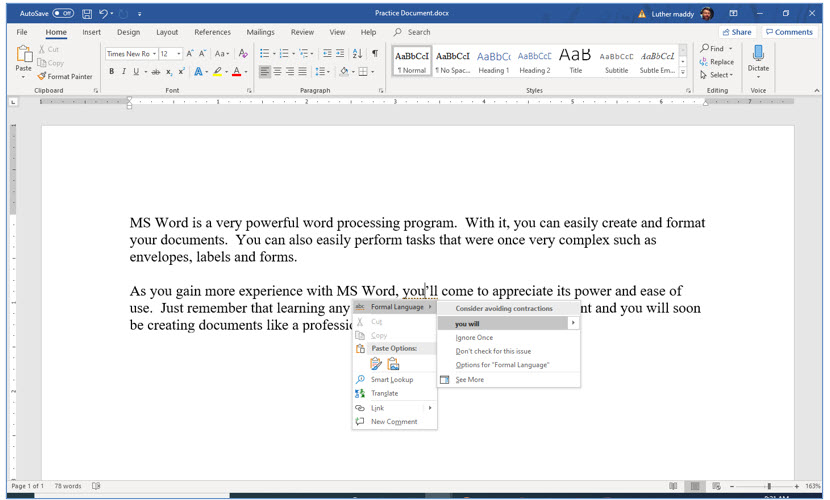
You should notice that Word has alerted you to this “error”.
7. Right-click in the underlined contraction, and then select you will in the correction options to correct this error.
Saving an Existing Document
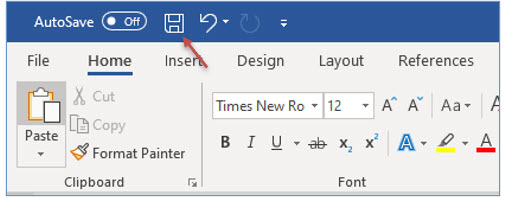
When you save a document that you have already saved, you can choose the Save rather than the Save As command. When you choose Save, Word will save the document with the name it already has. This makes the process of saving frequently very easy.
8. Click the File menu and choose Save.
This formula is =B6-B9.
You can also try the keyboard shortcut (Control+S) to save the open document.
When you execute the Save command, Word saved the file as it is right now. The changes you made are saved, and you will not lose them. You will want to develop the habit of regularly saving your document as you work on it. This will ensure that you do not lose any important work.
9. Click the File menu and choose Close
The document is now closed. Now you must either create a new document or open an existing document.
Sponsored Ads
2047
