Working with Data in Tables
After you have properly designed and created a database you can then begin to add and edit data directly into tables. In a future lesson you will learn to use forms to work with data, but this lesson will show you how to enter and edit data into Access tables.
Note: These lessons are excerpted from Luther Maddy’s Access Workbooks (C) 2024 which are available in printed or eBook format from Amazon: Access: The Basics and Access: Beyond The Basics
No Fault Travel Database to complete this chapter
Working with Data in Tables
You were probably wondering if you were ever going to get to work with data in this Access course. Well, you have finally reached that point. The purpose of the previous lessons was to strongly emphasize how important it is to get the structure of a database correct before you start using it with data. Now that you have the tables, table properties and the relationships setup, you can now begin to enter data into the database.
1. Open the No Fault Travel database.
2. In the list of tables, right-click the Travel Agents table and then select Open on the shortcut menu.
You could also double-click the table to open it.
You should now see the Datasheet View of the table. In this lesson you will enter data directly into the table and then arrange the data using Datasheet View. In the next lesson you will create forms, which provide a superior way of viewing and entering data.
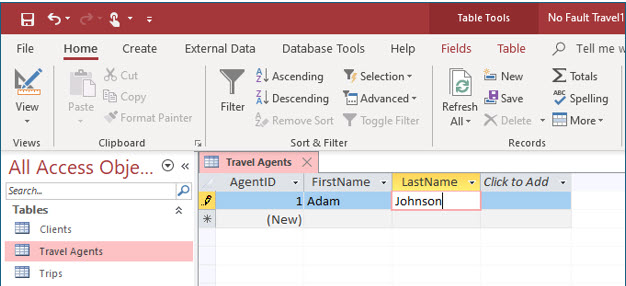
3. Click in the FirstName field and type Adam and press (Tab).
As soon as you began typing the first name, Access entered a number in the AgentID field.
4. In the LastName field type Johnson and press (Tab) twice.
Since Access will automatically enter the data in the AgentID field (because it has an AutoNumber field type), you skipped this field.
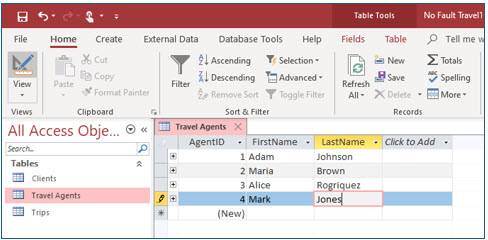
5. Enter the additional records as shown above.
Sorting Table Data
By default, Access sorts the records in a table by the primary key. In this table the primary key, the AgentID field, has the field type AutoNumber, so the ascending successive order from 1 to 4 is the order in which the records were entered. You can easily change the sorting order using the sorting tools .
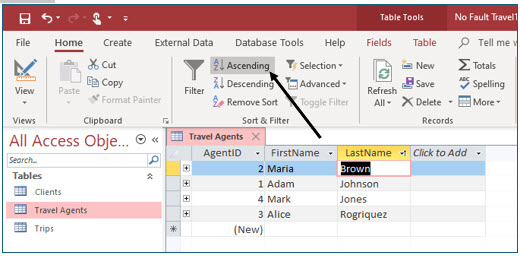
To change the sort order of a table, move into the field you want to sort on, and then click either Ascending or Descending tool in the Sort & Filter group on the Home tab ribbon.
1. Click in any cell of the LastName field in the table. Then click the Ascending tool in the Sort & Filter group on the Home tab ribbon.
The table is now sorted by last name.
Changing Column Widths
When you view data in a table, you may wish to adjust the width of a displayed column. Access allows you to increase or decrease a column width as desired.
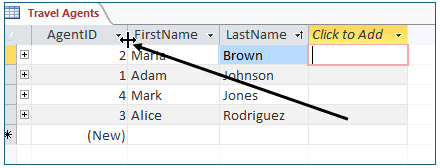
To manually adjust the column width, move the mouse pointer to the right border of the heading of the column you want to adjust. When the mouse pointer turns into a “black crosshair,” drag left to decrease the column width or drag right to increase column width.
To automatically adjust the column width, move the mouse pointer to the right border of the column heading you want to adjust. When the mouse pointer turns into the “black crosshair,” double-click and the column wide will automatically adjust so that the largest entry (including field name) in that field is visible.
1. Move the mouse pointer between the AgentID and FirstName column headings and double-click.
You should notice that Access decreased the width of the AgentID field column.
2. Use the same method to adjust the widths of the FirstName and LastName fields.
3. Close the table.
Access will ask if you want to save the changes you made to the design of this table. If you answer yes, the next time you open the table, it will be sorted by agent’s last name and the column widths will be as they are now. If you answer no, the table will revert to the default design which you altered.
4. Click Yes to save the changes you just made to the table design.
Editing Data
At some point, you will need to edit some data in the database. In the next steps, you will edit existing data from Datasheet View, but the same techniques can be used in forms.
1. Open the Travel Agents table.
To open a table in Datasheet View, you can double-click it in the Objects pane.
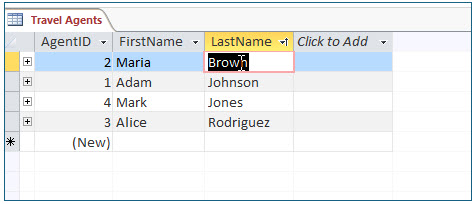
2. Double-click on Maria Brown’s last name.
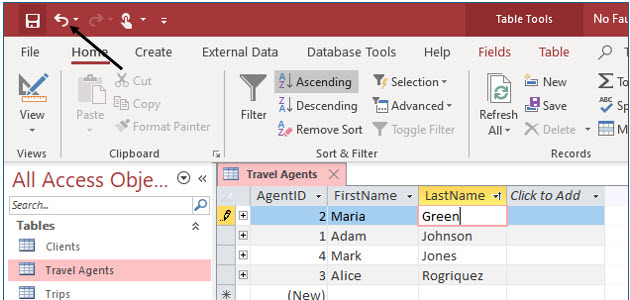
3. Type Green and press (Enter).
When the entire contents of the field is selected, whatever you type replaces the entire contents in the field.
4. Click the Undo tool on the Quick Access Toolbar to undo this change.
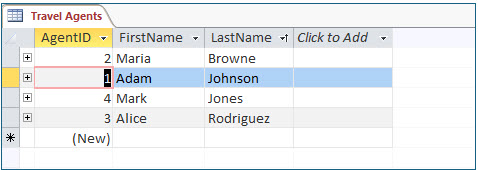
5. Click to the right of Brown in Maria Brown’s last name.
Notice that the insertion point is displayed. By single clicking in the cell, you can edit the cell contents letter by letter.
6. Type an e and press (Enter) to change the spelling of Maria’s last name.
Deleting Records
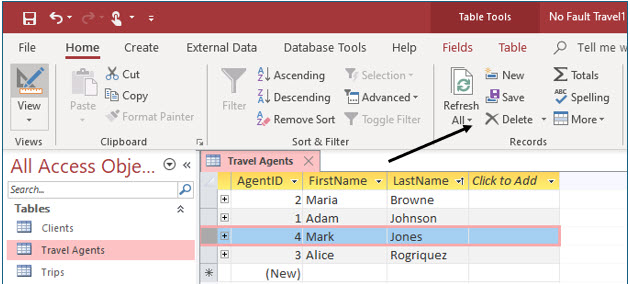
Access helps safeguard from deleting records accidentally by requiring you to confirm that you want to delete a record. To delete a record, you must select the entire record, or row, when you are in the datasheet view. You can select the entire record by clicking the record selector to the left of the first field in the record. Then, click the Delete drop-down arrow in the Records group of the Home tab ribbon. On the Delete drop-down list, choose Delete Record. You will be asked if you are sure you want to delete the record. If you answer yes, you will never see that record again. Delete with care.
1. Click the record selector to the left of Mark Jones’ AgentID. Then click the Delete tool in the Records group.
You will now see the delete confirmation.
2. Click Yes to delete the record.
This record is now permanently deleted.
3. Close the Travel Agents table and the No Fault Travel database.
