Combo Boxes and Form Enhancements
In this lesson, you will enhance a form’s appearance by adding titles and colors. You will also create combo boxes that allow you to lookup information from other tables when entering or editing data.
Note: These lessons are excerpted from Luther Maddy’s Access Workbooks (C) 2024 which are available in printed or eBook format from Amazon: Access: The Basics and Access: Beyond The Basics
No Fault Travel Database to complete this chapter
Combo Boxes and Form Enhancements
1. Open the No Fault Travel database.
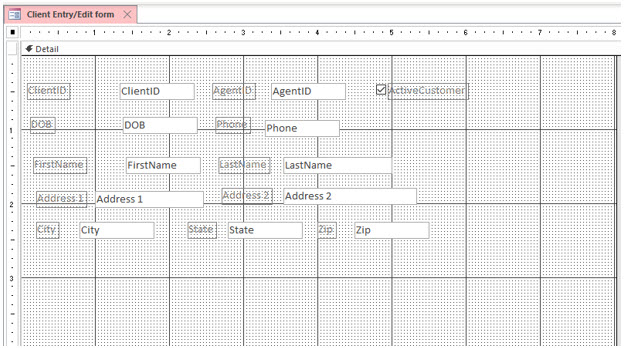
2. Display the Client Entry/Edit Form in Design View
Using the Controls Group
To add combo boxes and other form elements, you will need to use the Controls group. You will find the Controls group on the Form Design Tools Design tab on the ribbon.
3. If the Control group is not already displayed, click the Design tab under Form Design Tools.
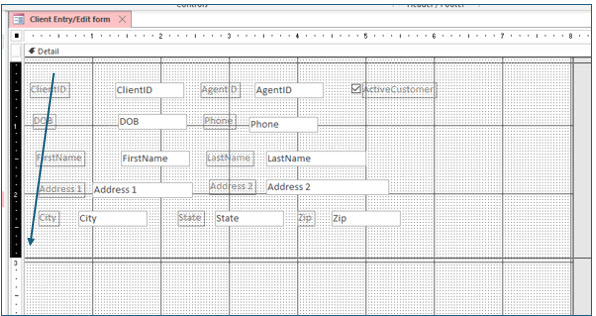
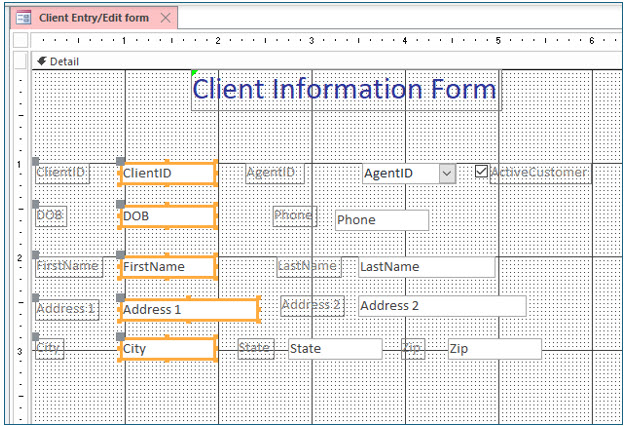
4. Use the vertical ruler to select all the controls in the detail section of the form.
When you move the mouse pointer to the vertical ruler, the pointer will become a black arrow. If you drag the black arrow on the vertical ruler from the form’s top to bottom, all controls will be selected.
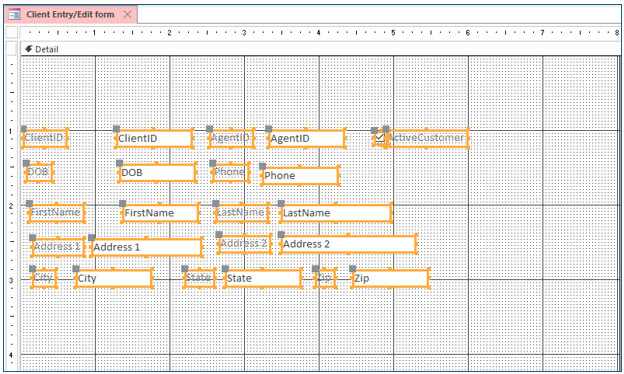
5. Point to any control, until the mouse pointer becomes a four-headed arrow. (Avoid close proximity to the sizing handles.)
The four-headed arrow will move all selected controls.
6. Drag the controls down so that the top of the first row is approximately at the 1” vertical position.
It may be necessary to increase the height of your form.
You will now use the Controls group to insert a label control at the top of this form. This label will serve as a title for viewing and printing.
7. Locate and click the Label control.
You do not need to drag this control. Just click on it to select it. Then move the mouse to the desired location on the form and click. Once the mouse pointer is moved to the form, the pointer changes to represent the label tool.
8. Move the mouse pointer to the top left corner of the detail section and click.
If you move the mouse pointer off the form, the mouse pointer transforms to a no-entry symbol. Move back on the form, and click when you see the large letter “A”. When you click, a tiny label appears with a blinking insertion point (cursor) where you can type the text you want displayed.
9. Type Client Information Form in the label and press (Enter).
You may notice that warning symbol appears and opens a message that the label is an unbound control (i.e., not associated with any data).
You should the see sizing handles on label control, which indicate that the label is selected and you can make changes to its appearance.
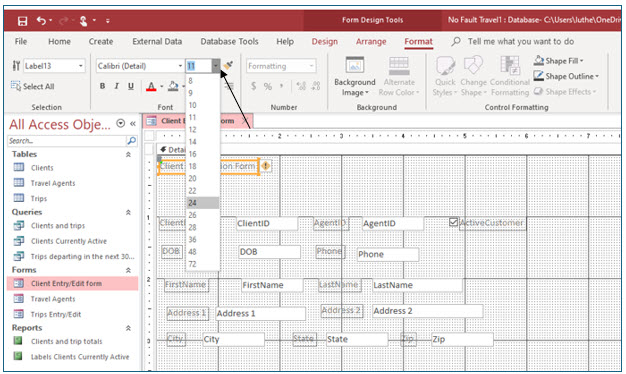
10. With the new label still selected, display the Form Design Tools Format tab. Change font size to 24 points.
The text font size increases, but the label control itself does not increase in size, so the text is no longer visible. In the next steps, you will have Access automatically adjust the size of the label control to fit the larger text.
11. Display the Form Design Tools Arrange tab.
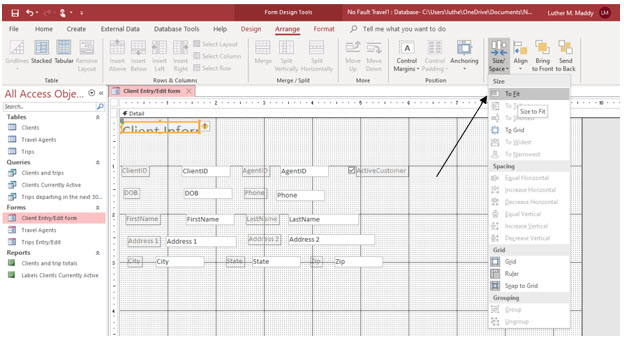
12. Click the Size/Space tool and choose To Fit on the drop-down menu.
The complete text should now be visible in the resized label control.
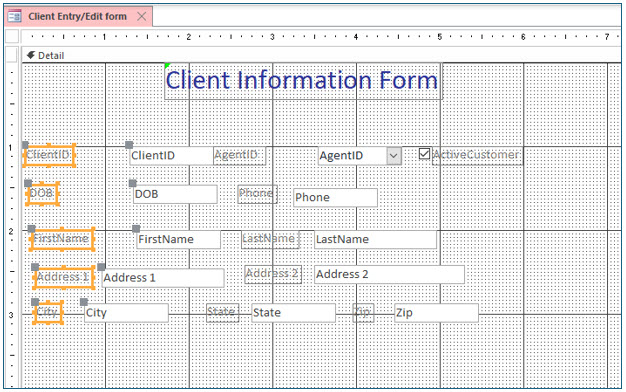
13. With the control still selected, drag the label to the top center of the used area of the form.
The horizontal and vertical rulers are helpful in positioning controls, but you do not need to be exact in this exercise.
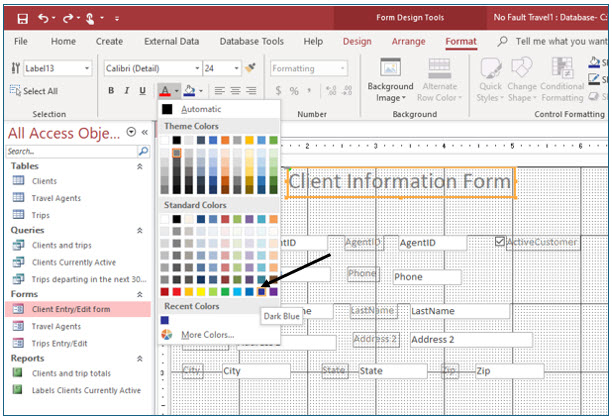
14. Click the Form Design Tools Format tab. Next click the drop-down arrow for font color. Select Dark Blue in the drop-down color options.
The label text should now be blue.
Creating a Combo Box
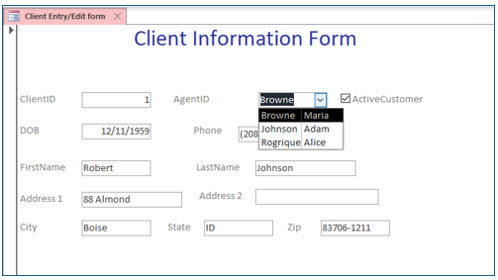
A combo box is a drop-down list that can appear on a form. Using a combo box, the data to be entered is selected from a list, instead of typed. Combo boxes are very useful for data entry and editing. In this part of the lesson, you will create a combo box that looks up and displays all travel agents in the Travel Agents table.
1. Click on the AgentID text box and press (Delete).
The text box is the “white box”. Deleting the text box will also delete the associated control AgentID label. You deleted this field because you will replace it with a combo box that looks up the travel agents directly from the Travel Agents table.
2. Display the Design tab. Then, locate and click the Combo Box tool on the Controls group.
As you move the mouse pointer over the form, the pointer transforms its shape to represent the combo box tool. The plus (+) shows you where the box’s top left corner will be located when you click. A label control will also appear to the left of the combo box, so you also need to make sure that there will be enough space for the label.
3. Move the mouse pointer just to the right of where the AgentID text box was located, and click.
The plus (+) should be about 3.5” from the left side. Use the horizontal ruler as a guide. Do not worry about being exact. You will adjust the combo box’s position later in this exercise. When you click, the Combo Box Wizard opens.
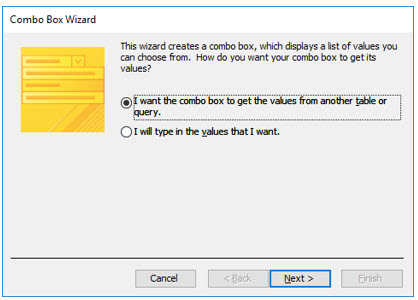
The Combo Box Wizard asks you if the values to be displayed are in another table (or query) or if you want to type in the values. In this case, the Travel Agent table has the values you want to display.
4. In the Combo Box Wizard, make sure that the option of getting the values from another table is selected. Click Next.
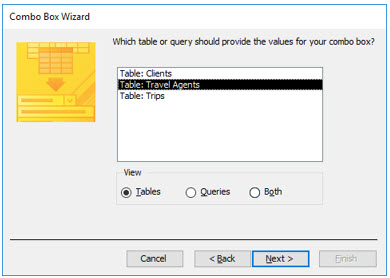
The next screen asks you to select the table containing the values you want to look up.
5. Choose the Travel Agents table and click Next.
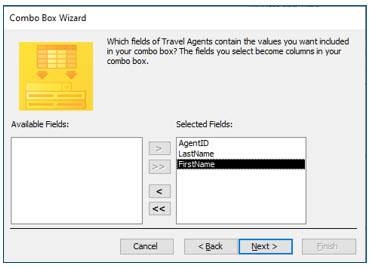
Access now asks which fields you want to display in the combo box. In this example, the AgentID field is the value you want. However, having the combo box display the travel agent’s name will help ensure you select the correct agent ID value.
6. Add the the AgentID field. Then, add the LastName and then the FirstName fields. Click Next after adding the fields.
You will have Access use all three fields in this combo box.
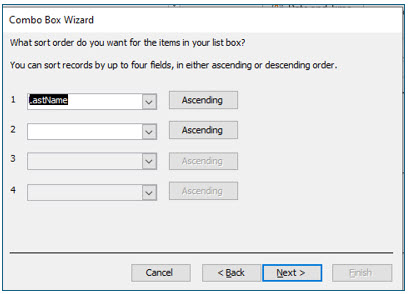
7. Choose the LastName field in ascending order for the sort and then Click Next in the sort step.
You have chosen to sort the agents by last name. This would make it easier to find one agent in a large list.
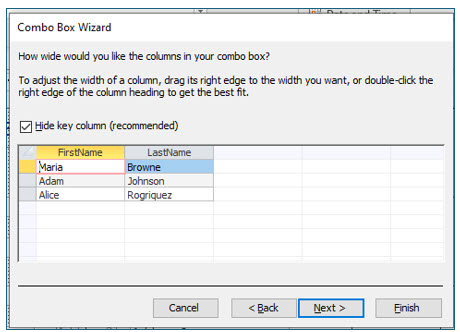
Access will now display a sample combo box list. By default, the primary key is not displayed, so the agent ID field is not visible. If you wanted to lookup agents by name, this would be a good choice. However, in this case, you need to look up the Agent ID, so you will have Access display all three fields.
8. Leave the Hide key column option checked.
Access will actually store the AgentID in this field but because you have left it hidden, you will see the agent’s name instead of their ID.
You can manually adjust the column widths here by dragging the column edges. You can also double-click each column’s right border, so that Access automatically adjusts it for “best fit”.
9. Adjust the column widths as desired and click Next.
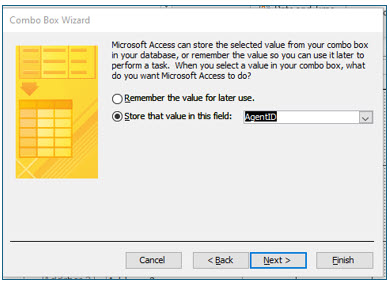
The Combo Box Wizard now asks what you want to do with the key field, AgentID once a user selects it from the combo box. You will now link this combo box to the AgentID field in the Clients tables.
10. In the next step, choose the Store that value in this field option and use the drop down list to choose the AgentID field. Click Next when done.
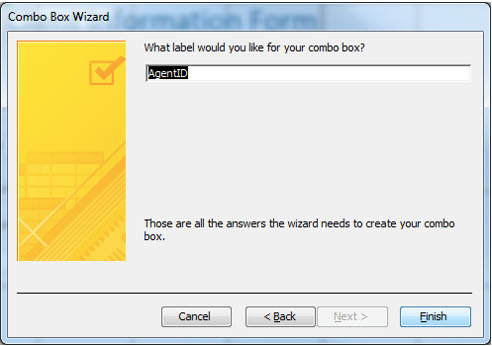
The final Combo Box Wizard screen asks you to label the combo box.
11. Enter a label of AgentID is the label text and click Finish.
Aligning Controls
You should now see the combo box and label. You will now use the Align command in Access to align the labels and text boxes. To align controls you will select the controls you want to align and then choose how you want the controls aligned. In this portion of the lesson you will left align several label controls. When you choose the Left Align command, Access will align the controls to the one that is farthest to the left.
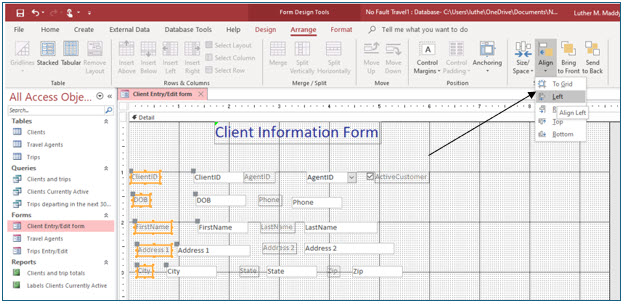
1. Select the label controls for ClientID, DOB, FirstName, Address, and City.
You can select multiple controls by selecting the first control and then holding down the (Shift) key as you select the remaining label controls.
2. With the labels selected, display the Form Design Tools Arrange tab and click the Alignment tool. Choose Left from the alignment options.
The labels should now all be perfectly aligned. You will now align the text boxes for these fields. As you created your form, you may have done a better job aligning the labels than the illustration. The align command can help in those situations where you do not get the controls perfectly aligned to begin with.
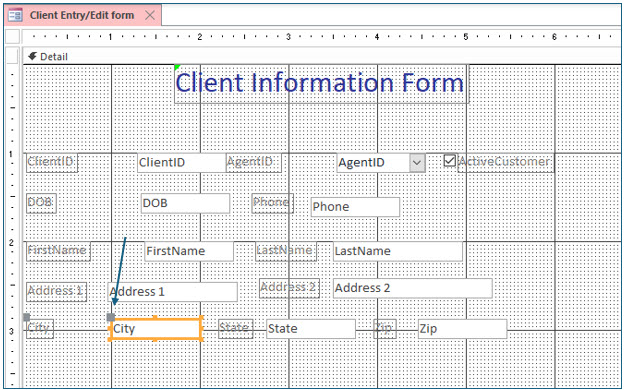
3. Select the City text box.
The textbox control is the white control, the one on the right.
4. Move the City text box so that its left edge is 1” from the left side of the form.
Use the horizontal ruler as a guide. You may need to move the State and Zip controls over to the right for this step.
You can move a single control by dragging the upper left corner of the control.
5. Now select the text boxes for City, Address1, FirstName, DOB, and ClientID.
Use the (Shift) key to select multiple controls. You can also double-click the vertical (or horizontal) ruler to select all controls directly under (or to the right).
6. On the Form Design Tools Arrange tab, click the Align tool and choose Align Left.
The text box controls should be perfectly aligned to the leftmost control, the City text box, in our case.
You are now ready to test your redesigned form.
7. Save the form. Click the View tool on the Form Design Tools Design tab, to view the form.
8. Verify that the AgentID combo box works correctly, by changing the Agent for one or two clients.
9. Save the form and then close the database.
