Advanced Form Features
Much of the power in an Access database comes when you intitally set it up. One of the essential elements of proper database design is understanding how to use Access' Form Features. This lesson will step you through using the more advanced form features that Access has to offer.
Note: These lessons are excerpted from Luther Maddy’s Access Workbooks (C) 2024 which are available in printed or eBook format from Amazon: Access: The Basics and Access: Beyond The Basics
Advanced Form Features
1. If it is not already open, open the No Fault Travel database.
2. Use the form wizard to create a form based on all the fields in TblTrips. Choose a Tabular form layout. Name the form FrmTrips.
3. Modify the labels and text boxes so the form appears as the one below in Design View.
Remember not to change the text in the text boxes. The text boxes must refer to the fields in the table. Use the ruler shown in the image as a guide. Increase the size of the text boxes to properly display the dates. You will use the blank space between the return date and cost field to add a calculated field in the next portion of this lesson.
4. Switch to Form View. Make sure it resembles the one below.
5. Return to Design View of this form.
We will now add a calculated field to this form. Ideally, most calculations should be performed in a query so they can be used, if desired, in multiple forms or queries. However, if you only need to use a calculated field on one form or one report, Access allows you to do this.
Creating a new text box
To create a field that computes values in a form you will need to create a new text box. This text box, instead of being bound to a field in the table or query, will compute a value based on the expression you enter into it.
6. Locate and click the Text Box tool in the Controls group.
When you create a text box, the text box will appear at the location of the mouse pointer when you click. The label will appear to the left of the text box (in columnar form, not tabular). You will need to move the label and resize and position the text box.
7. Move the mouse pointer just to the right of the ReturnDate text box and click.
A new text box containing the text “Unbound” should appear where you clicked the mouse. The term unbound lets you know that as of now, this text box does nothing. It is not bound to a field from the table or a calculation.
A label for this text box should also appear to the left of the text box.
8. Carefully click on and then delete the label for the new text box.
9. If needed, reposition the new text box so if fits nicely between the text boxes for the return date and cost fields.
Since you deleted the label Access created for the new text box, you will have to add one yourself. You will do this by copying the existing label for trip cost. After copying it, you will need to reposition it and change the text it displays.
10. Carefully select just the label for the Cost field and click the Copy tool on the Home tab.
The copy and paste commands can also be executed by using the shortcut keys Control+C and Control+V or by right-clicking to open the shortcut menu.
11. Now execute the Paste command and move the copy of the label above the Unbound text box.
You will need to change the size of the Form Header. If so, you can click and drag the top of the Detail bar to shorten the Form Header.
12. Change the text on the copied label to read Trip Length.
You will now enter a formula into the text box to compute the length of the trip.
Entering formulas in a text box
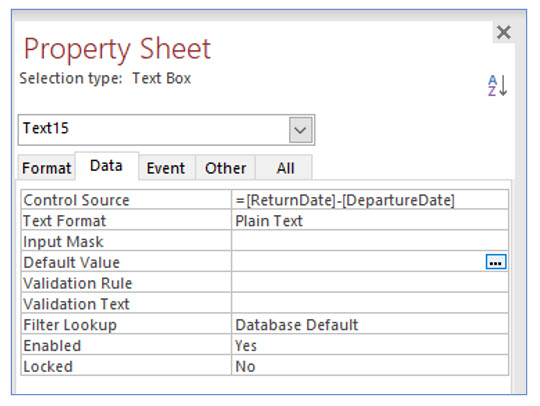
To have a text box compute a value, you must enter a formula into the control source of that box. While you can simply click in the text box and type the formula, you will often want to do this using the Property Sheet for the text box. Since you may also want to change the format of the computed value to, for example, currency, you will need to change the box’s properties eventually. When creating a formula using the Property Sheet, you enter the formula in the Control Source row, located on the Data tab.
1. Select the Unbound text box and display its properties.
Text box properties can be accessed using the ribbon or shortcut menu. On the ribbon’s Design tab, the Property Sheet tool is located in the Tools group. You can also right-click the text box and choose Properties from the shortcut menu.
2. On the Property Sheet, display the Data tab. In the Control Source row, type =[ReturnDate]-[DepartureDate].
Notice this formula begins with an equals sign. The equals sign is needed for form and report calculations, but not for calculated fields in queries.
Instead of typing this formula in the space provided on the row, you could also use the Zoom dialog box or the Expression Builder dialog box to enter the formula, as we did earlier. Expression Builder will open when you click the build button in the row. The Zoom box can be opened with the shortcut keys (Shift+F2). Alternatively, either dialog box can be accessed by right-clicking in the Control Source row to open the shortcut menu.
3. Click the Format tab in the Property Sheet and change the Format property to General Number.
4. Close the Property Sheet and save the form. View the form in Form View.
You should see the trip length computed in the calculated field you created.
5. Close the FrmTrips form after examining it.
Creating and using subforms
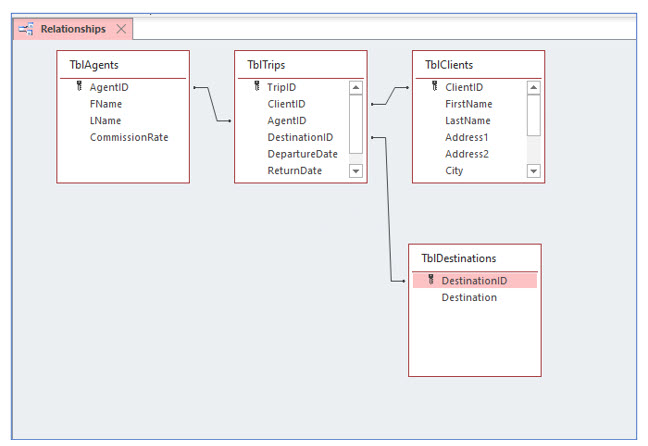
When you created the lookup fields in the trips table, Access created relationships between the trips table and the destinations, clients, and agents tables. To view the relationships between tables, go to the Database Tools tab on the ribbon and click on the Relationships tool.
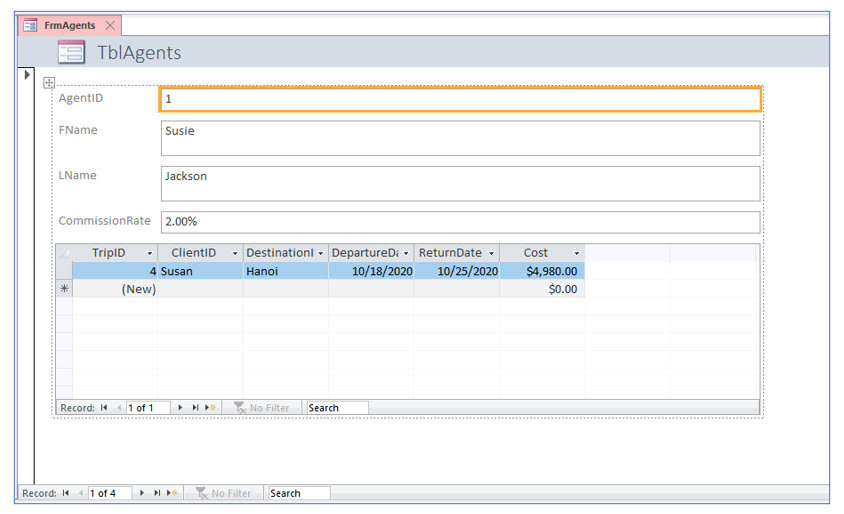
If you use the Form tool to create a new form from a table that is linked to another, Access will automatically create a subform to display the related records. For example, if you create a form based on the Agents table, Access will automatically add a subform that displays the trips that agent has booked. Likewise, if you use this tool to create a form based on Clients, Access will automatically add a subform for the trips that client has booked. In the next step, you will create a form based on the agents table.
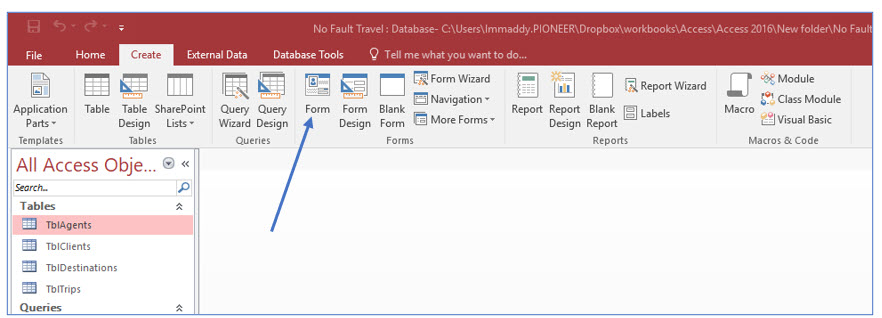
1. In the navigation pane, click once on TblAgents. On the Create tab, click the Form tool.
You should see a main form for TblAgents and a subform with the linked table TblTrips.
2. Save this new form as FrmAgents and close it.
If existing forms are based on related records, you can combine them using the subform feature. Forms can have more than one subform. For example, if you added a payment history table to this database, you could add a subform to the clients form that displayed the trip information and another subform for payment information.
When creating forms with subforms, the main form should be columnar and the subform(s) tabular. You have already created a columnar FrmClients and a tabular FrmTrips. In the next steps, we will insert the trips form (as a subform) into the clients form. Since the tables are linked, the trips that are displayed will be related to the current client record.
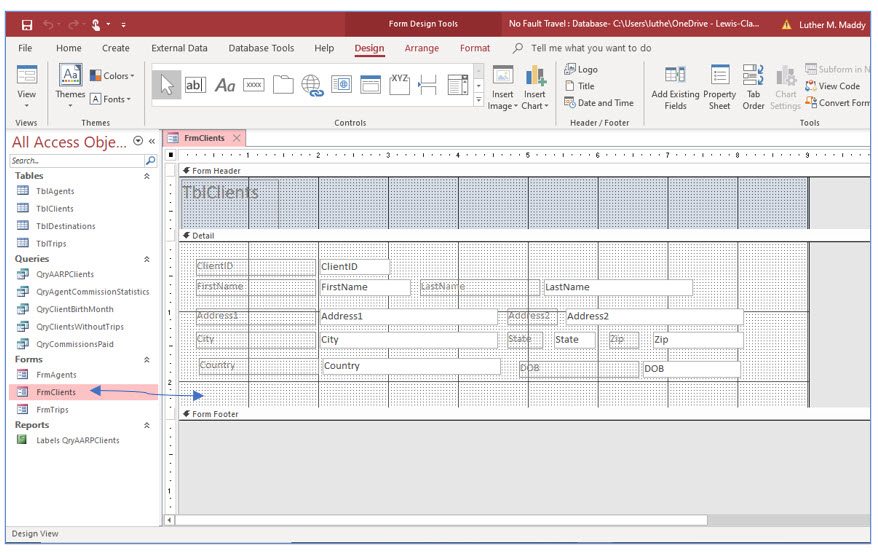
3. Display FrmClients in Design View.
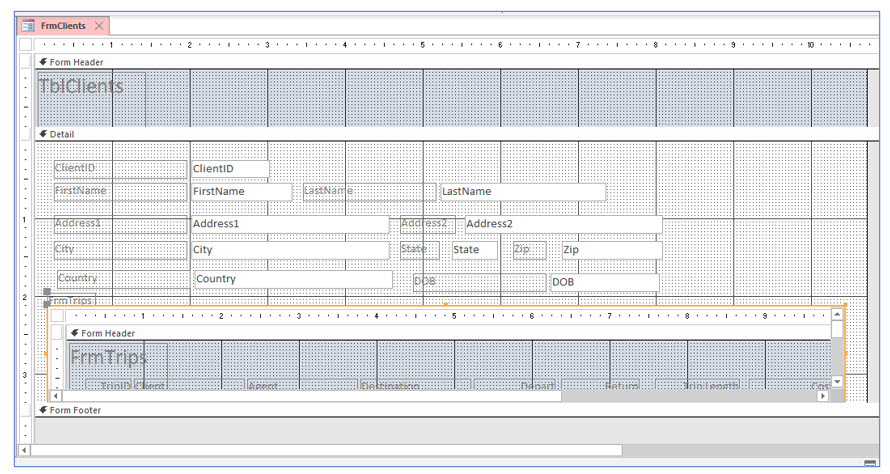
4. Carefully drag FrmTrips from the Navigation Pane to the bottom left corner of FrmClient (below the Country field).
In the clients form, notice a large control which will be the list of trips booked by the client.
5. Increase the height of the FrmTrips subform by approximately 1.”
You might have to first increase the height of the FrmClients form by dragging the Form Footer bar down slightly, so that you can see the bottom center sizing handle on the FrmTrips subform.
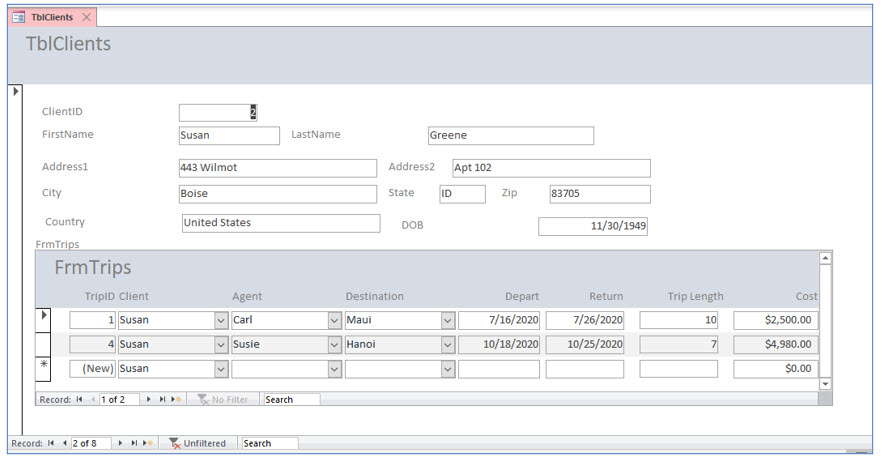
6. Save and then switch to Form View.
The client and the trips booked by that client should be visible. To browse through the client records, use the navigation buttons at the bottom of the clients form window. The navigation buttons for the trips are located on the trips subform.
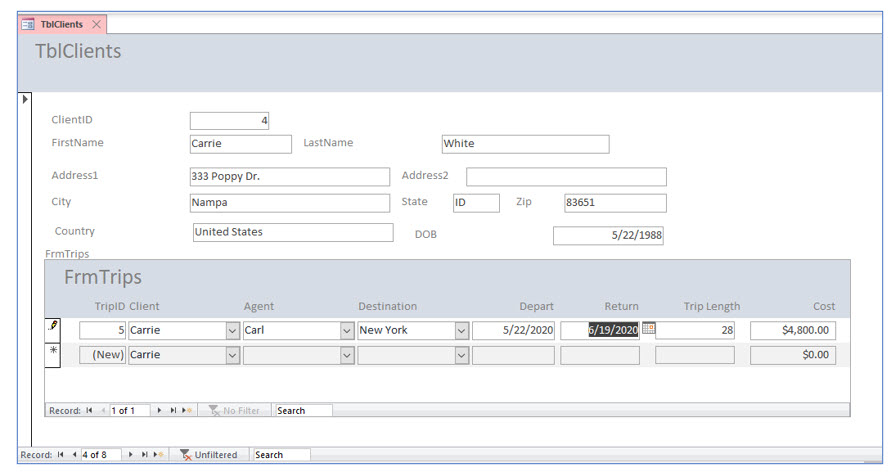
7. Display Carrie White’s record and enter an additional trip as shown below.
This client can be found by browsing through the records using the navigation buttons or using the Find tool on the ribbon’s Home tab. As you can see from this portion of the lesson, subforms are a convenient way to enter and edit data.
8. Close the Clients form.


